

Tutorial: Displaying Java OpenGL in an Eclipse editor with a menu bar and a run/pause button
Wade Walker // Dec 6, 2010 11:21:18 PMHi again! Wade Walker here, back for the fourth tutorial in my ongoing series on writing scientific and engineering apps with Java OpenGL and Eclipse. OK, that might sound pretty forbidding, but it’s really not—if you want to write any type of app with a complex interface and 3D graphics, these tutorials can help.
I am returned as well! I am called Stitio, and, much as a viticulturist will build a trellis to guide his vines upwards to the sun, I create these headings to coax our readers’ comprehensions to fruition!
Over the last three tutorials, me and my suddenly-wine-loving friend Stitio created a simple Java OpenGL (JOGL) app and showed how we can use the Eclipse Rich Client Platform (RCP) to let it run cross-platform and to create native binaries.
And in this, the quatrième partie of our oeuvre, we first revisit our humble origins before reaching a new apotheosis!
Hmm, your guess is as good as mine there. But what I think Stitio means is, before we can pile this thing any higher, we need to get a firmer foundation under it. First we’ll rename a few things to make more sense, and we’ll change the type of Eclipse RCP window we draw in so we won’t run into trouble later on. Then we’ll add a menu bar to our app, and finally
we’ll give it a toolbar with a run/pause button that can start and stop the simulation.
Let the science begin! Again!
Preparing the soil: Wherein we set up our workspace yet once more
We’ll build on the previous tutorial, so long-time readers can continue in the same workspace as last time. Or if you’re just joining us, you can create a new workspace directory, unzip JOGL and the previous tutorial into it, and follow the instructions from the second tutorial to import those projects into a new workspace.
As usual, if you just want to skip to the end of this tutorial without all the clicky-typey, you can unzip JOGL and this tutorial into a new workspace directory, import them, and you’re done.
Changing the rootstock: Renaming one’s project and package
When I started this tutorial series, I didn’t realize I’d be expanding the same project over and over. So like an idiot I’ve been naming every tutorial’s project something different. But however! I can pretend I meant to do this all along, and show you how to use Eclipse’s refactoring features to change a project name.
It starts off innocently enough. Right-click the project “name.wadewalker.vbotutorial” in the package editor and select “Refactor > Rename…”.

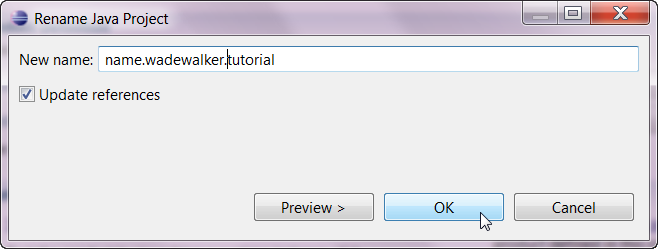
Then change the project name to “name.wadewalker.tutorial” and click “OK”.
Now, no one says the package name has to match the project, but I’ve got a bit of a compulsiveness problem. To change the package name to “tutorial”, open the “src” directory inside the project, right-click “name.wadewalker.vbotutorial” and select “Refactor > Rename…”.

Then change the package name to “name.wadewalker.tutorial” and click “OK”.

In any sane world, that would be the end of it. But there are a few more references to the old project name squirreled away! So, lemons into lemonade, et cetera—here’s how you fix those.
There are three places in the Tutorial.product file that refer to the old name. First, double-click on “Tutorial.product” inside the “name.wadewalker.tutorial” project, click the “Overview” tab at the bottom, and change the product name to “name.wadewalker.tutorial.product”.

Then change the application name to “name.wadewalker.tutorial.application” the same way.

Click the “Dependencies” tab at the bottom of the product editor, then select the “name.wadewalker.vbotutorial” plugin and click “Remove”.

Then click “Add…”, type “name” in the filter box, select “name.wadewalker.tutorial”, and click “OK” to add the dependency back with the new name.

There’s one more reference to the old project name inside the plugin.xml file. Double-click “plugin.xml” to open the plugin file editor, then click the “Extensions” tab at the bottom, open “org.eclipse.core.runtime.products” and select “Tutorial (product)”. Change the application name on the right to “name.wadewalker.tutorial.application”.

So now our project’s totally renamed, I’ve learned a lesson in thinking ahead, and you’ve learned a lesson in Eclipse refactoring. Champagne and sushi all ‘round!
Side note to all you Eclipse smarty-pantses out there: if you wanted to cheat, you could have done these last few changes by closing Eclipse, editing Tutorial.product and plugin.xml in a text editor, and restarting Eclipse. But beware! Sometimes this sort of thing works fine, but other times you also have to delete your .metadata directory and recreate it by re-importing your projects to get things back in sync.
Nipping a view in the bud: Removing our simple “view” to make way for an “editor”
Mea culpa number two! I gotta confess to you guys, I used an Eclipse “view” for the first tutorial because it was easy, it worked, and it kept the tutorial short so we didn’t blast apart the tender cortexes of any first-time Eclipse developers out there.
But the view wasn’t meant to be a long-term choice. Eclipse views are really supposed to show things like code outlines or object properties. There can only be one view of each type open at a time, and they usually show information about the currently selected file or object. Right now our graphical display isn’t editable, but it will be eventually, and views aren’t generally where you’re supposed to be doing your editing in an Eclipse RCP application.
An Eclipse “editor” is what we really need for the long term. Editors can be attached to files, and they let you put buttons in the toolbar. But you need to create three Java files just to make one editor, so I had put it off until later. Well, it’s later now, babies! Time to yank off those training wheels.
First we get rid of our view’s code. Open “src > name.wadewalker.tutorial” inside the project, then right-click “JOGLView.java” and select “Delete”.

When the confirmation dialog pops up, click “OK”.

Once the view’s code is gone, we tell Eclipse not to put that view into the workspace anymore. Double-click “Perspective.java” inside the “name.wadewalker.tutorial” package and change the contents to look like this:
package name.wadewalker.tutorial;

import org.eclipse.ui.IPageLayout;
import org.eclipse.ui.IPerspectiveFactory;

public class Perspective implements IPerspectiveFactory {

    /*
     * Makes the editor area visible with no views.
     * @see org.eclipse.ui.IPerspectiveFactory#createInitialLayout(org.eclipse.ui.IPageLayout)
     */
    public void createInitialLayout( IPageLayout ipagelayout ) {
        ipagelayout.setEditorAreaVisible( true );
    }
}
Let’s run it and see what butchery we’ve performed on our poor app. Right-click the project “name.wadewalker.tutorial” in the package explorer and select “Debug As > Eclipse Application”.

Depending on your workspace, you may see this prompt to save your files. If so, check “Always save resources before launching” and click “OK”.

When you finally launch you’ll see an app with an empty editor area like this. It’s naked! One fig leaf, coming up.
![]()
Grafting on a new scion: We create an empty editor and let it show us nothing
The first step towards an editor is creating an empty one. To help your clicky-hands grow strong, I’ll show how to do that using the Eclipse GUI instead of by hacking file contents like a savage.
First, there’s one more bit of the view remaining: its “metadata”. To remove it, double-click “plugin.xml” to open the plugin file editor, then click the “Extensions” tab at the bottom. Select “org.eclipse.ui.views”, then click “Remove”.

Perhaps our gentle readers would appreciate a tastevin-full of explanation for this “metadata”?
I’ll just pretend like I know what that means. You can customize Eclipse to create RCP apps in two different ways: by adding metadata to the “plugins.xml” file, and by adding code. Some customizations, like adding a new menu item to Eclipse with a simple plugin, you can do entirely with metadata. The kind of stuff we’re doing in a full-custom RCP app mostly involves adding code.
But a downside to this metadata is that sometimes Eclipse doesn’t have a fully programmatic way to do something. In our case, creating views and editors involves both metadata and code. So as you might expect, now that we’ve removed the view’s metadata, we have to add some metadata for the editor.
Click “Add…”, then type “org.eclipse.ui.e” in the filter box, select “org.eclipse.ui.editors”, and click “Finish”.

Then in the “Extension Element Details” set the ID to “name.wadewalker.tutorial.jogleditor”, the name to “JOGLEditor”, the class to “JOGLEditor”, and the contributor class to “JOGLEditorActionBarContributor”. The result should look like this:

Now the metadata for the editor is complete, so we can write some code. Click the “class” link, set the package to “name.wadewalker.tutorial.jogleditor” and click “Finish”.

This creates you a new editor class in JOGLEditor.java. Note that we put it into a separate package. That’s so we can put the other files associated with this editor in there too, for better organization.
The bare-bones editor that Eclipse creates won’t quite work on its own, we need to juice it up a bit. First, add this member into the JOGLEditor class:
    /** Workbench uses this ID to refer to instances of this type of editor. */
    public static final String ssID = "name.wadewalker.tutorial.jogleditor";
Then replace the init() method with this one:
    //================================================================
    /**
     * Initializes this editor with the given editor site and input.
     *
     * @param ieditorsite The editor site.
     * @param ieditorinput The editor input.
     * @throws PartInitException if this editor was not initialized successfully.
     * @see org.eclipse.ui.part.EditorPart#init(org.eclipse.ui.IEditorSite, org.eclipse.ui.IEditorInput)
     */
    @Override
    public void init( IEditorSite ieditorsite, IEditorInput ieditorinput ) throws PartInitException {

        setSite( ieditorsite );
        if( ieditorinput != null )
            setInput( ieditorinput );
    }
The second thing an editor needs is an “action bar contributor”. In Eclipse-speak, a “contributor” is a class that’s responsible for putting controls into tool bars, menus, status lines, and similar places. The action bar contributor of an editor puts the custom buttons for the editor into the app’s tool bar.
You may be asking yourself, “Why have a whole separate class just to put buttons into the tool bar? Isn’t that kind of insane?” Well, it makes sense in the Eclipseiverse. When you’ve got a big framework like Eclipse, you want to have as much separability as possible, so you don’t have to change the whole framework to change one part. And one of the ways they do this is by defining separate class types to handle common tasks like this, so that these separate types can be changed without affecting anything else.
Our first version of the action bar contributor is just an empty shell that does nothing. To create it, navigate back to the plugin editor “Extensions” tab, click the “contributorClass” link, set the package to “name.wadewalker.tutorial.jogleditor” and click “Finish”.

OK, now the editor’s two-thirds done! But we still need one more file to make it work. See, there’s a reason we didn’t do this in the first tutorial!
The last thing we need is an input object for the editor. The input object is what the editor is editing. If this were a text editor, the input object would wrap a text file. Eventually, once our app supports graphical editing of some science-y data, we’ll store that data in a file and put that file in the input object. But for now, we can just make an empty input object.
To create the input object, right-click “name.wadewalker.tutorial.jogleditor” in the package explorer, then select “New > Class”.

Set the class name to “JOGLEditorInput” and click “Finish”.

Copy these contents into JOGLEditorInput.java. This is just enough code to get us by for now.
package name.wadewalker.tutorial.jogleditor;

import org.eclipse.jface.resource.ImageDescriptor;
import org.eclipse.ui.IEditorInput;
import org.eclipse.ui.IPersistableElement;

//================================================================
/**
 * Editor input object for the JOGL editor. Currently these editors
 * aren't associated with any files, but eventually they will be.
 *
 * @author Wade Walker
 * @version 1.0
 */
public class JOGLEditorInput implements IEditorInput {

    //================================================================
    /**
     * Returns an object which is an instance of the given class
     * associated with this object. Returns null if no such object can
     * be found.
     *
     * @param classAdapter the adapter class to look up.
     * @return an object castable to the given class, or null if this
     * object does not have an adapter for the given class.
     * @see org.eclipse.core.runtime.IAdaptable#getAdapter(java.lang.Class)
     */
    @SuppressWarnings("rawtypes")
    public Object getAdapter( Class classAdapter ) {
        if( classAdapter.equals( JOGLEditorInput.class ) )
            return this;

        return null;
    }

    @Override
    public boolean exists() {
        return true;
    }

    @Override
    public ImageDescriptor getImageDescriptor() {
        return null;
    }

    @Override
    public String getName() {
        return "JOGLEditor";
    }

    @Override
    public IPersistableElement getPersistable() {
        return null;
    }

    @Override
    public String getToolTipText() {
        return "Editor that uses JOGL";
    }
}
Now that the editor’s three parts are all created, we can show the empty editor in the workbench. Later on we’ll let the user open editors on demand, but for now, we’ll open one editor when our program starts.
To do that, double-click “ApplicationWorkbenchWindowAdvisor.java” in the package explorer and add this method.
    //================================================================
    /**
     * Performs final setup once the window is open.
     *
     * @see org.eclipse.ui.application.WorkbenchWindowAdvisor#postWindowOpen()
     */
    @Override
    public void postWindowOpen() {

        IWorkbenchWindow iworkbenchwindow = PlatformUI.getWorkbench().getActiveWorkbenchWindow();

        try {
            iworkbenchwindow.getActivePage().openEditor( new JOGLEditorInput(), JOGLEditor.ssID );
        } catch( PartInitException partinitexception ) {
            // TODO: add error handling
        }
    }
After you paste in this code, you’ll see that some of the class names have red underlines. This means they haven’t been imported yet. Another Eclipse teachable moment! Hover the mouse over each of these until the “quick fix” window appears, then click the “import” quick fix to add the import statement at the top of the class.
Now when you right-click the project and select “Debug As > Eclipse Application” you’ll see an empty editor.
![]()
It looks almost exactly like the empty editor area from before, but with a tab showing the editor’s name. Now that’s progress!
The first scion bears fruit: Our new editor displays the graphics from our old view
Now we gotta get our OpenGL graphics back where they were in the last tutorial. Replace the contents of JOGLEditor.java with this:
package name.wadewalker.tutorial.jogleditor;

import java.io.IOException;
import java.nio.ByteBuffer;
import java.nio.ByteOrder;
import java.nio.FloatBuffer;
import java.util.List;

import javax.media.opengl.GL;
import javax.media.opengl.GL2;
import javax.media.opengl.GL2ES1;
import javax.media.opengl.GLContext;
import javax.media.opengl.GLDrawableFactory;
import javax.media.opengl.GLProfile;
import javax.media.opengl.fixedfunc.GLMatrixFunc;
import javax.media.opengl.glu.GLU;

import name.wadewalker.tutorial.Activator;
import name.wadewalker.tutorial.DataSource;
import name.wadewalker.tutorial.DataSource.DataObject;

import org.eclipse.core.runtime.IProgressMonitor;
import org.eclipse.jface.action.IAction;
import org.eclipse.jface.bindings.keys.ParseException;
import org.eclipse.swt.SWT;
import org.eclipse.swt.graphics.Rectangle;
import org.eclipse.swt.layout.FillLayout;
import org.eclipse.swt.opengl.GLCanvas;
import org.eclipse.swt.opengl.GLData;
import org.eclipse.swt.widgets.Composite;
import org.eclipse.swt.widgets.Event;
import org.eclipse.swt.widgets.Listener;
import org.eclipse.ui.IActionBars;
import org.eclipse.ui.IEditorInput;
import org.eclipse.ui.IEditorSite;
import org.eclipse.ui.PartInitException;
import org.eclipse.ui.PlatformUI;
import org.eclipse.ui.part.EditorPart;

import com.jogamp.common.nio.Buffers;

public class JOGLEditor extends EditorPart {

    /** Workbench uses this ID to refer to instances of this type of editor. */
    public static final String ssID = "name.wadewalker.tutorial.jogleditor";

    /** Holds the OpenGL canvas. */
    protected Composite composite;

    /** Widget that displays OpenGL content. */
    protected GLCanvas glcanvas;

    /** Used to get OpenGL object that we need to access OpenGL functions. */
    protected GLContext glcontext;

    /** Source of data to draw. */
    protected DataSource datasource;

    /** X distance to translate the viewport by. */
    protected float fViewTranslateX = 0.0f;

    /** Y distance to translate the viewport by. */
    protected float fViewTranslateY = 0.0f;

    /** Ratio of world-space units to screen pixels.
     * Increasing this zooms the display out,
     * decreasing it zooms the display in. */
    protected float fObjectUnitsPerPixel = 0.03f;

    /** Index of vertex buffer object. We store interleaved vertex and color data here
     * like this: x0, r0, y0, g0, z0, b0, x1, r1, y1, g1, z1, b1...
     * Stored in an array because glGenBuffers requires it. */
    protected int [] aiVertexBufferIndices = new int [] {-1};

    /** Constant used in FPS calculation. */
    protected static final long slMillisecondsPerSecond = 1000;

    /** Number of frames drawn since last FPS calculation. */
    protected int iFPSFrames;

    /** Time in milliseconds at start of FPS calculation interval. */
    protected long lFPSIntervalStartTimeMS;

    //================================================================
    /**
     * Constructor.
     */
    public JOGLEditor() {
        datasource = new DataSource();
    }

    @Override
    public void doSave( IProgressMonitor monitor ) {
        // TODO Auto-generated method stub

    }

    @Override
    public void doSaveAs() {
        // TODO Auto-generated method stub

    }

    //================================================================
    /**
     * Initializes this editor with the given editor site and input.
     *
     * @param ieditorsite The editor site.
     * @param ieditorinput The editor input.
     * @throws PartInitException if this editor was not initialized successfully.
     * @see org.eclipse.ui.part.EditorPart#init(org.eclipse.ui.IEditorSite, org.eclipse.ui.IEditorInput)
     */
    @Override
    public void init( IEditorSite ieditorsite, IEditorInput ieditorinput ) throws PartInitException {

        setSite( ieditorsite );
        if( ieditorinput != null )
            setInput( ieditorinput );

        // create action handlers
/*        try {
            Activator.createKeyBinding(
                new IAction [] {
                    ieditorsite.getActionBars().getGlobalActionHandler( RunPauseAction.ssID ),
                },
                new String [] {
                    "Space",
                },
                getSite() );
        }
        catch( ParseException parseexception ) {
            throw new PartInitException( parseexception.getMessage() );
        }
        catch( IOException ioexception ) {
            throw new PartInitException( ioexception.getMessage() );
        }*/
    }

    //================================================================
    /**
     * Disposes all OpenGL resources in case this view is closed and reopened.
     * @see org.eclipse.ui.part.WorkbenchPart#dispose()
     */
    @Override
    public void dispose() {
        disposeVertexBuffers();
        glcanvas.dispose();
        super.dispose();
    }

    @Override
    public boolean isDirty() {
        // TODO Auto-generated method stub
        return false;
    }

    @Override
    public boolean isSaveAsAllowed() {
        // TODO Auto-generated method stub
        return false;
    }

    //================================================================
    /**
     * Sets up an OpenGL canvas to draw in.
     * @see org.eclipse.ui.part.WorkbenchPart#createPartControl(org.eclipse.swt.widgets.Composite)
     */
    @Override
    public void createPartControl( Composite compositeParent ) {
        GLProfile glprofile = GLProfile.get( GLProfile.GL2 );

        composite = new Composite( compositeParent, SWT.NONE );
        composite.setLayout( new FillLayout() );

        GLData gldata = new GLData();
        gldata.doubleBuffer = true;
        glcanvas = new GLCanvas( composite, SWT.NO_BACKGROUND, gldata );
        glcanvas.setCurrent();
        glcontext = GLDrawableFactory.getFactory( glprofile ).createExternalGLContext();

        glcanvas.addListener( SWT.Resize, new Listener() {
            public void handleEvent( Event event ) {
                glcanvas.setCurrent();
                glcontext.makeCurrent();
                GL2 gl = glcontext.getGL().getGL2();
                setTransformsAndViewport( gl );
                glcontext.release();
            }
        });

        glcontext.makeCurrent();
        GL2 gl = glcontext.getGL().getGL2();
        gl.setSwapInterval( 1 );
        gl.glClearColor( 1.0f, 1.0f, 1.0f, 1.0f );
        gl.glColor3f( 1.0f, 0.0f, 0.0f );
        gl.glHint( GL2ES1.GL_PERSPECTIVE_CORRECTION_HINT, GL.GL_NICEST );
        gl.glClearDepth( 1.0 );
        gl.glLineWidth( 2 );
        gl.glEnable( GL.GL_DEPTH_TEST );
        glcontext.release();

        // spawn a worker thread to call the renderer in a loop until the program closes.
        (new Thread() {
            public void run() {

                // look at the run/pause button state to see whether we should be running or not
//                RunPauseAction runpauseaction = (RunPauseAction)getEditorSite().getActionBars().getGlobalActionHandler( RunPauseAction.ssID );

                // render once to get it on screen (we start out paused)
                render();

                try {
                    while( (glcanvas != null) && !glcanvas.isDisposed() ) {
                        // if we're running, render in the GUI thread
                        if( true /*runpauseaction.isRunning()*/ )
                            render();
                        // else we're paused, so sleep for a little so we don't peg the CPU
                        else
                            sleep( 250 );
                    }
                } catch( InterruptedException interruptedexception ) {
                    // if sleep interrupted just let the thread quite
                }
            }
        }).start();
    }

    //================================================================
    /**
     * Calculates the FPS and shows it in the status line.
     */
    protected void calculateAndShowFPS() {
        ++iFPSFrames;
        long lTime = System.currentTimeMillis();
        // update the FPS (once per second at most, to avoid flooding
        // the UI with text updates)
        long lTimeIntervalMS = lTime - lFPSIntervalStartTimeMS;
        if( lTimeIntervalMS >= slMillisecondsPerSecond ) {
            lFPSIntervalStartTimeMS = lTime;
            int iFPS = (int)((double)(iFPSFrames * slMillisecondsPerSecond) / (double)lTimeIntervalMS);
            iFPSFrames = 0;
            getEditorSite().getActionBars().getStatusLineManager().setMessage( String.format( "FPS: %d", iFPS ) );
        }
    }

    //================================================================
    /**
     * Renders into the GUI thread synchronously. Meant to be called
     * from a worker thread.
     */
    private void render() {

        PlatformUI.getWorkbench().getDisplay().syncExec( new Runnable() {
            public void run() {
                if( (glcanvas != null) && !glcanvas.isDisposed() ) {
                    glcanvas.setCurrent();
                    glcontext.makeCurrent();
                    GL2 gl2 = glcontext.getGL().getGL2();
                    gl2.glClear( GL.GL_COLOR_BUFFER_BIT | GL.GL_DEPTH_BUFFER_BIT );
                    gl2.glClearColor( 1.0f, 1.0f, 1.0f, 1.0f );

                    // create vertex buffers if needed, then copy data in
                    int [] aiNumOfVertices = createAndFillVertexBuffer( gl2, datasource.getData() );

                    // needed so material for quads will be set from color map
                    gl2.glColorMaterial( GL.GL_FRONT_AND_BACK, GL2.GL_AMBIENT_AND_DIFFUSE );
                    gl2.glEnable( GL2.GL_COLOR_MATERIAL );

                    // draw all quads in vertex buffer
                    gl2.glBindBuffer( GL.GL_ARRAY_BUFFER, aiVertexBufferIndices[0] );
                    gl2.glEnableClientState( GL2.GL_VERTEX_ARRAY );
                    gl2.glEnableClientState( GL2.GL_COLOR_ARRAY );
                    gl2.glVertexPointer( 3, GL.GL_FLOAT, 6 * Buffers.SIZEOF_FLOAT, 0 );
                    gl2.glColorPointer( 3, GL.GL_FLOAT, 6 * Buffers.SIZEOF_FLOAT, 3 * Buffers.SIZEOF_FLOAT );
                    gl2.glPolygonMode( GL.GL_FRONT, GL2.GL_FILL );
                    gl2.glDrawArrays( GL2.GL_QUADS, 0, aiNumOfVertices[0] );

                    // disable arrays once we're done
                    gl2.glBindBuffer( GL.GL_ARRAY_BUFFER, 0 );
                    gl2.glDisableClientState( GL2.GL_VERTEX_ARRAY );
                    gl2.glDisableClientState( GL2.GL_COLOR_ARRAY );
                    gl2.glDisable( GL2.GL_COLOR_MATERIAL );

                    glcanvas.swapBuffers();
                    glcontext.release();

                    // advance time so the data changes for the next frame
                    datasource.incrementTime( 0.005 );

                    calculateAndShowFPS();
                }
            }
        });
    }

    //================================================================
    /**
     * Sets up an orthogonal projection suitable for a 2D CAD program.
     *
     * @param gl GL object to set transforms and viewport on.
     */
    protected void setTransformsAndViewport( GL2 gl2 ) {

        Rectangle rectangle = glcanvas.getClientArea();
        int iWidth = rectangle.width;
        int iHeight = Math.max( rectangle.height, 1 );

        gl2.glMatrixMode( GLMatrixFunc.GL_PROJECTION );
        gl2.glLoadIdentity();

        // set the clipping planes based on the ratio of object units
        // to screen pixels, but preserving the correct aspect ratio
        GLU glu = new GLU();
        glu.gluOrtho2D( -(fObjectUnitsPerPixel * iWidth) / 2.0f,
                         (fObjectUnitsPerPixel * iWidth) / 2.0f,
                        -(fObjectUnitsPerPixel * iHeight) / 2.0f,
                         (fObjectUnitsPerPixel * iHeight) / 2.0f );

        gl2.glMatrixMode( GLMatrixFunc.GL_MODELVIEW );
        gl2.glViewport( 0, 0, iWidth, iHeight );
        gl2.glLoadIdentity();
        gl2.glTranslatef( fViewTranslateX, fViewTranslateY, 0.0f );
    }

    //================================================================
    /**
     * Creates vertex buffer object used to store vertices and colors
     * (if it doesn't exist). Fills the object with the latest
     * vertices and colors from the data store.
     *
     * @param gl2 GL object used to access all GL functions.
     * @return the number of vertices in each of the buffers.
     */
    protected int [] createAndFillVertexBuffer( GL2 gl2, List<DataObject> listDataObjects ) {

        int [] aiNumOfVertices = new int [] {listDataObjects.size() * 4};

        // create vertex buffer object if needed
        if( aiVertexBufferIndices[0] == -1 ) {
            // check for VBO support
            if(    !gl2.isFunctionAvailable( "glGenBuffers" )
                || !gl2.isFunctionAvailable( "glBindBuffer" )
                || !gl2.isFunctionAvailable( "glBufferData" )
                || !gl2.isFunctionAvailable( "glDeleteBuffers" ) ) {
                Activator.openError( "Error", "Vertex buffer objects not supported." );
            }

            gl2.glGenBuffers( 1, aiVertexBufferIndices, 0 );

            // create vertex buffer data store without initial copy
            gl2.glBindBuffer( GL.GL_ARRAY_BUFFER, aiVertexBufferIndices[0] );
            gl2.glBufferData( GL.GL_ARRAY_BUFFER,
                              aiNumOfVertices[0] * 3 * Buffers.SIZEOF_FLOAT * 2,
                              null,
                              GL2.GL_DYNAMIC_DRAW );
        }

        // map the buffer and write vertex and color data directly into it
        gl2.glBindBuffer( GL.GL_ARRAY_BUFFER, aiVertexBufferIndices[0] );
        ByteBuffer bytebuffer = gl2.glMapBuffer( GL.GL_ARRAY_BUFFER, GL2.GL_WRITE_ONLY );
        FloatBuffer floatbuffer = bytebuffer.order( ByteOrder.nativeOrder() ).asFloatBuffer();

        for( DataObject dataobject : listDataObjects )
            storeVerticesAndColors( floatbuffer, dataobject );

        gl2.glUnmapBuffer( GL.GL_ARRAY_BUFFER );

        return( aiNumOfVertices );
    }

    //================================================================
    /**
     * Stores the vertices and colors of one object interleaved into
     * a buffer (vertices in counterclockwise order).
     * @param floatbuffer Buffer to store vertices and colors in.
     * @param dataobject Object whose vertices and colors are stored.
     */
    protected void storeVerticesAndColors( FloatBuffer floatbuffer, DataObject dataobject ) {

        floatbuffer.put( dataobject.getX() );
        floatbuffer.put( dataobject.getY() );
        floatbuffer.put( 0.0f );

        floatbuffer.put( dataobject.getColor()[0] );
        floatbuffer.put( dataobject.getColor()[1] );
        floatbuffer.put( dataobject.getColor()[2] );

        floatbuffer.put( dataobject.getX() + dataobject.getWidth() );
        floatbuffer.put( dataobject.getY() + dataobject.getHeight() );
        floatbuffer.put( 0.0f );

        floatbuffer.put( dataobject.getColor()[0] );
        floatbuffer.put( dataobject.getColor()[1] );
        floatbuffer.put( dataobject.getColor()[2] );

        floatbuffer.put( dataobject.getX() );
        floatbuffer.put( dataobject.getY() + dataobject.getHeight() );
        floatbuffer.put( 0.0f );

        floatbuffer.put( dataobject.getColor()[0] );
        floatbuffer.put( dataobject.getColor()[1] );
        floatbuffer.put( dataobject.getColor()[2] );
    }

    //================================================================
    /**
     * Deletes the vertex and color buffers.
     */
    protected void disposeVertexBuffers() {
        glcontext.makeCurrent();
        GL2 gl2 = glcontext.getGL().getGL2();
        gl2.glDeleteBuffers( 1, aiVertexBufferIndices, 0 );
        aiVertexBufferIndices[0] = -1;
        glcontext.release();
    }

    @Override
    public void setFocus() {
        // TODO Auto-generated method stub

    }
}
This is almost exactly the same code that showed OpenGL in a view last time. It’s just been slightly adapted to go in an editor instead. Also, there are a few bits commented out that we’re not ready to try yet.
Now when you right-click the project and select “Debug As > Eclipse Application” you’ll see the same animated display as in the last tutorial, but in an editor instead of a view. All this work, just to get back to where we were last time!

Grafting on a second scion: Adding a “menu bar” to our barren application
OK, now we’re finally ready to blast ahead of where our last tutorial ended. First new feature: a menu bar! There won’t be much in it right now, but we’ve gotta start somewhere.
First we turn on the menu bar by replacing ApplicationWorkbenchWindowAdvisor.preWindowOpen() with this code.
    //================================================================
    /**
     * Configures the window before it opens.
     *
     * @see org.eclipse.ui.application.WorkbenchWindowAdvisor#preWindowOpen()
     */
    @Override
    public void preWindowOpen() {
        IWorkbenchWindowConfigurer iworkbenchwindowconfigurer = getWindowConfigurer();
        iworkbenchwindowconfigurer.setTitle( "Tutorial" );
        iworkbenchwindowconfigurer.setInitialSize( new Point( 400, 300) );
        iworkbenchwindowconfigurer.setShowMenuBar( true );
        iworkbenchwindowconfigurer.setShowCoolBar( false );
        iworkbenchwindowconfigurer.setShowStatusLine( true );
    }
Next, we need to put an “action” into the menu so we’ll have something to click on. In Eclipse, an action is something the app does in response to user interaction. We wrap these actions up into objects, which we can put into menus and attach to buttons. In this case, we’ll use a standard “Exit” action that Eclipse defines for us.
Replace the contents of ApplicationActionBarAdvisor.java with this code to add an “Exit” action to the menu bar:
package name.wadewalker.tutorial;

import org.eclipse.jface.action.ICoolBarManager;
import org.eclipse.jface.action.IMenuManager;
import org.eclipse.jface.action.MenuManager;
import org.eclipse.jface.action.ToolBarManager;
import org.eclipse.ui.IWorkbenchActionConstants;
import org.eclipse.ui.IWorkbenchWindow;
import org.eclipse.ui.actions.ActionFactory;
import org.eclipse.ui.actions.ActionFactory.IWorkbenchAction;
import org.eclipse.ui.application.ActionBarAdvisor;
import org.eclipse.ui.application.IActionBarConfigurer;

//================================================================
/**
 * Creates, adds, and disposes the actions for the workbench window.
 *
 * @author Wade Walker
 * @version 1.0
 */
public class ApplicationActionBarAdvisor extends ActionBarAdvisor {

    /** Exits the app. */
    private IWorkbenchAction iworkbenchactionExit;

    //================================================================
    /**
     * Constructor.
     *
     * @param iactionbarconfigurer Data needed to configure the action bar.
     */
    public ApplicationActionBarAdvisor( IActionBarConfigurer iactionbarconfigurer ) {
        super( iactionbarconfigurer );
    }

    //================================================================
    /**
     * Creates and registers actions.
     *
     * @param iworkbenchwindow Window the actions are for.
     * @see org.eclipse.ui.application.ActionBarAdvisor#makeActions(org.eclipse.ui.IWorkbenchWindow)
     */
    @Override
    protected void makeActions( final IWorkbenchWindow iworkbenchwindow ) {
        iworkbenchactionExit = ActionFactory.QUIT.create( iworkbenchwindow );
        register( iworkbenchactionExit );
    }

    //================================================================
    /**
     * Puts actions into the main menu bar.
     *
     * @param imenumanagerBar The menu manager for the menu bar.
     * @see org.eclipse.ui.application.ActionBarAdvisor#fillMenuBar(org.eclipse.jface.action.IMenuManager)
     */
    @Override
    protected void fillMenuBar( IMenuManager imenumanagerBar ) {

        MenuManager menumanagerFile = new MenuManager( "&File", IWorkbenchActionConstants.M_FILE );
        imenumanagerBar.add( menumanagerFile );
        menumanagerFile.add( iworkbenchactionExit );
    }

    //================================================================
    /**
     * Puts the tool bar into the "cool bar" for the window.
     *
     * @param icoolbarmanager Used to add tool bars.
     * @see org.eclipse.ui.application.ActionBarAdvisor#fillCoolBar(org.eclipse.jface.action.ICoolBarManager)
     */
    @Override
    protected void fillCoolBar( ICoolBarManager icoolbarmanager ) {
        super.fillCoolBar( icoolbarmanager );

        ToolBarManager toolbarmanager = new ToolBarManager();
        icoolbarmanager.add( toolbarmanager );
    }
}
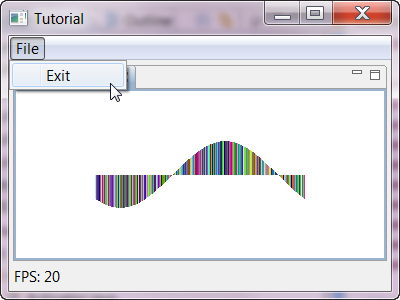
Now when you run the app, you’ll see a menu bar with an “Exit” action in it. When you select it, the app exits. Hey, I never claimed this first one would set the universe on fire.
Grafting on a third scion, or, “The Fructification”: Adding a button which runs or pauses our simulation
Eventually our app will be a full-fledged SCIENCE! program that runs some sort of physical simulation, and we’ll need a way to start and stop the simulation so we can interact with it. Ergo, a run/pause button like on an MP3 player.
To add a run/pause button to our toolbar, first we need icons to put on the button. Create a directory named “jogleditor” inside “name.wadewalker.tutorial\icons” to hold them.
Now, I could draw some icons myself, but that’s a one-way non-refundable ticket to Ugly App Land. Fortunately for me, there are thousands of icons inside Eclipse already, and they’re easy to get to. Unzip the file “plugins\org.eclipse.jdt.debug.ui_3.5.0.v20100602-0830.jar” from your Eclipse installation in some convenient place. Then copy “resume_co.gif” and “suspend_co.gif” from the “icons\full\elcl16” directory into our new “name.wadewalker.tutorial\icons\jogleditor” directory.
![]()
Might we not harvest other icons from within Eclipse at a later time?
Indeed we might! Lots of the JAR files inside Eclipse contain useful icons. If you unzip them all and remove everything but the icons from the resulting directories, you’ll have quite a collection. Usually I can find what I need somewhere in there, or at least find a good starting point for a new icon.
Now that we’ve got icons on disk, we need some code to read them in, and some code to set up keyboard shortcuts for buttons. We get that by replacing Activator.java with this code:
package name.wadewalker.tutorial;

import java.io.IOException;
import java.util.ArrayList;
import java.util.List;

import javax.media.opengl.GLProfile;

import org.eclipse.core.commands.Category;
import org.eclipse.core.commands.Command;
import org.eclipse.core.commands.ParameterizedCommand;
import org.eclipse.core.commands.contexts.Context;
import org.eclipse.core.runtime.IStatus;
import org.eclipse.core.runtime.Status;
import org.eclipse.jface.action.IAction;
import org.eclipse.jface.bindings.Binding;
import org.eclipse.jface.bindings.Scheme;
import org.eclipse.jface.bindings.keys.KeyBinding;
import org.eclipse.jface.bindings.keys.KeySequence;
import org.eclipse.jface.bindings.keys.ParseException;
import org.eclipse.jface.commands.ActionHandler;
import org.eclipse.jface.dialogs.ErrorDialog;
import org.eclipse.jface.resource.ImageDescriptor;
import org.eclipse.ui.IWorkbenchPartSite;
import org.eclipse.ui.PlatformUI;
import org.eclipse.ui.commands.ICommandService;
import org.eclipse.ui.contexts.IContextService;
import org.eclipse.ui.handlers.IHandlerService;
import org.eclipse.ui.keys.IBindingService;
import org.eclipse.ui.plugin.AbstractUIPlugin;
import org.osgi.framework.BundleContext;

/**
 * The activator class controls the plug-in life cycle
 */
public class Activator extends AbstractUIPlugin {

    // The plug-in ID
    public static final String PLUGIN_ID = "name.wadewalker.tutorial"; //$NON-NLS-1$

    // The shared instance
    private static Activator plugin;

    /** Eclipse packages needed during key binding. */
    private static final String ssDefaultSchemeID = "org.eclipse.ui.defaultAcceleratorConfiguration";
    private static final String ssParentContextID = "org.eclipse.ui.contexts.window";

    /** ID and name of command category used in key binding. */
    private static final String ssCommandCategoryID = "Tutorial.commands.category";
    private static final String ssCommandCategoryName = "Tutorial commands";

    /** ID and name of command context used in key binding. */
    private static final String ssContextID = "viewerKeyContext";
    private static final String ssContextName = "In Placement Editor";

    // Needed to set up threading properly for JOGL on Linux systems. This
    // has to be done before any X11 calls, so it goes here in the class
    // Eclipse loads first.
    // NOTE: If you don't put this early enough, you'll probably get SIGSEGV
    // in libpthread.so (or other sorts of multithreading errors) when you
    // try to run the program.
    static {
        GLProfile.initSingleton();
    }

    /**
     * The constructor
     */
    public Activator() {
    }

    /*
     * (non-Javadoc)
     * @see org.eclipse.ui.plugin.AbstractUIPlugin#start(org.osgi.framework.BundleContext)
     */
    public void start(BundleContext context) throws Exception {
        super.start(context);
        plugin = this;
    }

    /*
     * (non-Javadoc)
     * @see org.eclipse.ui.plugin.AbstractUIPlugin#stop(org.osgi.framework.BundleContext)
     */
    public void stop(BundleContext context) throws Exception {
        plugin = null;
        super.stop(context);
    }

    /**
     * Returns the shared instance
     *
     * @return the shared instance
     */
    public static Activator getDefault() {
        return plugin;
    }

    /**
     * Returns an image descriptor for the image file at the given
     * plug-in relative path
     *
     * @param path the path
     * @return the image descriptor
     */
    public static ImageDescriptor getImageDescriptor(String path) {
        return imageDescriptorFromPlugin(PLUGIN_ID, path);
    }

    //================================================================
    /**
     * Returns an image descriptor for the specified icon.
     *
     * @param sIconPath Path to the icon file inside the "icons"
     * directory of the plugin project.
     * @return the image descriptor for the specified icon.
     */
    public static ImageDescriptor getIcon( String sIconPath ) {

        ImageDescriptor imagedescriptor = Activator.getImageDescriptor( "icons/" + sIconPath );
        if( imagedescriptor == null )
            imagedescriptor = ImageDescriptor.getMissingImageDescriptor();

        return( imagedescriptor );
    }

    //================================================================
    /**
     * Opens an error dialog box and logs the error.
     * @param sDialogTitle Title of dialog box.
     * @param istatus Status object to get message from.
     */
    public static void openError( String sDialogTitle, IStatus istatus ) {
        ErrorDialog.openError( PlatformUI.getWorkbench().getActiveWorkbenchWindow().getShell(),
                               sDialogTitle,
                               null,
                               istatus );
        Activator.getDefault().log( sDialogTitle + " : " + istatus.getMessage() );
    }

    //================================================================
    /**
     * Opens an "internal error" dialog box and logs the error.
     * @param exception Exception containing the message to put in the dialog box.
     */
    public static void openError( Exception exception ) {
        openError( "Internal error", new Status( Status.ERROR,
                                                 Activator.PLUGIN_ID,
                                                   exception.getMessage() != null
                                                 ? exception.getMessage()
                                                 : exception.getClass().toString() ) );
        Activator.getDefault().log( exception.getMessage(), exception );
    }

    //================================================================
    /**
     * Opens an error dialog box and logs the error.
     * @param sDialogTitle Dialog box title.
     * @param sMessage Message to put in dialog box.
     */
    public static void openError( String sDialogTitle, String sMessage ) {
        openError( sDialogTitle, new Status( Status.ERROR, Activator.PLUGIN_ID, sMessage ) );
        Activator.getDefault().log( sDialogTitle + " : " + sMessage );
    }

    //================================================================
    /**
     * Prints a message to the Eclipse log.
     *
     * @param sMessage Message to print.
     */
    public void log( String sMessage ) {
        log( sMessage, null );
    }

    //================================================================
    /**
     * Prints a message to the Eclipse log.
     *
     * @param sMessage Message to print.
     * @param exception Exception we're logging.
     */
    public void log( String sMessage, Exception exception ) {
        getLog().log( new Status( Status.INFO, PLUGIN_ID, Status.OK, sMessage, exception ) );
    }

    //================================================================
    /**
     * Creates key bindings for an array of actions, saving them to
     * the preference store if needed.
     *
     * Only creates a new key sequence if one doesn't exist for this
     * context; otherwise, leaves any altered user preferences in place.
     *
     * Takes an array so the number of writes to the preference store
     * can be minimized.
     *
     * TODO: this code is using the binding service in a way that
     * Paul Webster (the guy responsible for this part of Eclipse)
     * seems uncomfortable with, but right now there's no other option.
     * This code may be able to be replaced after Eclipse 3.4 sometime,
     * when PW finally puts in a programmatic interface for this.
     *
     * @param aiaction Actions to create key binding for.
     * @param asKey Keys to bind actions to (in the format required by KeySequence).
     * If the key string of an action is null, this method still activates
     * a handler and defines this action's command, which is needed to stop
     * some logged warnings when showing actions in menus.
     * @param iworkbenchpartsite Site to do the binding at.
     * @throws ParseException if one of the key strings can't be parsed.
     * @throws IOException if the key bindings can't be saved to the preference store.
     */
    public static void createKeyBinding( IAction [] aiaction,
                                         String [] asKey,
                                         IWorkbenchPartSite iworkbenchpartsite )
        throws ParseException, IOException {
        assert( aiaction.length == asKey.length );

        // services outside loop for speed
        IHandlerService ihandlerservice = (IHandlerService)iworkbenchpartsite.getService( IHandlerService.class );
        ICommandService icommandservice = (ICommandService)iworkbenchpartsite.getService( ICommandService.class );
        IContextService icontextservice = (IContextService)iworkbenchpartsite.getService( IContextService.class );
        IBindingService ibindingservice = (IBindingService)PlatformUI.getWorkbench().getAdapter( IBindingService.class );

        // current bindings
        Binding [] abinding = ibindingservice.getBindings();

        // new  bindings
        List<Binding> listNewBindings = new ArrayList<Binding>( 0 );

        for( int i = 0; i < aiaction.length; i++ ) {

            ActionHandler actionhandler = new ActionHandler( aiaction[i] );
            ihandlerservice.activateHandler( aiaction[i].getActionDefinitionId(), actionhandler );

            Category category = icommandservice.getCategory( ssCommandCategoryID );
            if( !category.isDefined() )
                category.define( ssCommandCategoryName, null );

            Command command = icommandservice.getCommand( aiaction[i].getActionDefinitionId() );
            if( !command.isDefined() )
                command.define( aiaction[i].getText(), aiaction[i].getDescription(), category );

            Context context = icontextservice.getContext( ssContextID );
            if( !context.isDefined() )
                context.define( ssContextName, null, ssParentContextID );

            icontextservice.activateContext( ssContextID );

            boolean bCreateNewBinding = true;

            // make sure the binding doesn't already exist for this context
            for( Binding binding : abinding ) {
                if(    (binding.getParameterizedCommand() != null)
                    && binding.getParameterizedCommand().getCommand().getId().equals( aiaction[i].getActionDefinitionId() )
                    && binding.getContextId().equals( ssContextID ) )
                    bCreateNewBinding = false;
            }

            if( bCreateNewBinding && (asKey[i] != null) ) {
                ParameterizedCommand parameterizedcommand = new ParameterizedCommand( command, null );
                KeySequence keysequence = KeySequence.getInstance( asKey[i] );
                listNewBindings.add( new KeyBinding( keysequence, parameterizedcommand,
                                                     ssDefaultSchemeID, ssContextID,
                                                     null, null, null,
                                                     Binding.USER ) );
            }
        }

        if( listNewBindings.size() == 0 )
            return;

        // add new bindings to current and save them
        Binding [] abindingNew = listNewBindings.toArray( new Binding [] {} );
        Binding [] abindingPlusNew = new Binding[abinding.length + abindingNew.length];

        System.arraycopy( abinding, 0, abindingPlusNew, 0, abinding.length );
        System.arraycopy( abindingNew, 0, abindingPlusNew, abinding.length, abindingNew.length );

        Scheme schemeDefault = ibindingservice.getScheme( ssDefaultSchemeID );
        ibindingservice.savePreferences( schemeDefault, abindingPlusNew );
    }
}
Now we create the action that happens when the user presses the run/pause button. Back when we put the exit action in the menu bar, we used an existing action that Eclipse defined. But this time we have to make our own action from scratch.
Right-click “name.wadewalker.tutorial.jogleditor” in the package explorer, then select “New > Class”. Set the class name to “RunPauseAction” and click “Finish”.

Replace the contents of RunPauseAction.java with this code:
package name.wadewalker.tutorial.jogleditor;

import name.wadewalker.tutorial.Activator;

import org.eclipse.jface.action.Action;

//================================================================
/**
 * Runs or pauses the simulation on alternate button presses.
 * Changes the picture and tooltip of the button accordingly.
 *
 * @author Wade Walker
 * @version 1.0
 */
public class RunPauseAction extends Action {

    /** Unique action ID for the Eclipse platform. */
    public static final String ssID = "JOGLEditor.RunPauseAction";

    /** True if the simulation is running, false if it's paused. */
    private boolean bRunning = false;

    //================================================================
    /**
     * Constructor.
     */
    public RunPauseAction() {
        super( "Run", Action.AS_PUSH_BUTTON );
        setToolTipText( "Run simulation" );
        setImageDescriptor( Activator.getIcon( "jogleditor/resume_co.gif" ) );
        setId( ssID );
        setActionDefinitionId( ssID );
    }

    //================================================================
    /**
     * Code to run the action.
     *
     * @see org.eclipse.jface.action.Action#run()
     */
    @Override
    public void run() {
        if( bRunning ) {
            setToolTipText( "Run simulation" );
            setImageDescriptor( Activator.getIcon( "jogleditor/resume_co.gif" ) );
        }
        else {
            setToolTipText( "Pause simulation" );
            setImageDescriptor( Activator.getIcon( "jogleditor/suspend_co.gif" ) );
        }
        bRunning = !bRunning;
    }

    //================================================================
    /**
     * Accessor.
     * @return true if the simulation is running, false otherwise.
     */
    public boolean isRunning() {
        return( bRunning );
    }
}
Turn on the toolbar by changing one line in ApplicationWorkbenchWindowAdvisor.preWindowOpen() to this:
iworkbenchwindowconfigurer.setShowCoolBar( true );
Now finally we can finish the action bar contributor for our editor and make it add our new button to the tool bar. Replace the contents of JOGLEditorActionBarContributor.java with this code:
package name.wadewalker.tutorial.jogleditor;

import org.eclipse.jface.action.IToolBarManager;
import org.eclipse.ui.IActionBars;
import org.eclipse.ui.IWorkbenchPage;
import org.eclipse.ui.part.EditorActionBarContributor;

//================================================================
/**
 * Contributes the JOGLEditor's actions to the action bar.
 *
 * @author Wade Walker
 * @version 1.0
 */
public class JOGLEditorActionBarContributor extends EditorActionBarContributor {

    /** Runs and pauses the simulation. */
    private RunPauseAction runpauseaction;

    //================================================================
    /**
     * Constructor. Creates the actions.
     */
    public JOGLEditorActionBarContributor() {
        runpauseaction = new RunPauseAction();
    }

    //================================================================
    /**
     * Registers action handlers.
     *
     * @param iactionbars Used to register global actions.
     * @param iworkbenchpage Used to set part listeners.
     * @see org.eclipse.ui.part.EditorActionBarContributor#init(org.eclipse.ui.IActionBars, org.eclipse.ui.IWorkbenchPage)
     */
    @Override
    public void init( IActionBars iactionbars, IWorkbenchPage iworkbenchpage ) {
        super.init( iactionbars, iworkbenchpage );

        // register handlers
        iactionbars.setGlobalActionHandler( RunPauseAction.ssID, runpauseaction );
    }

    //================================================================
    /**
     * Contributes the editor's actions to the tool bar.
     *
     * @param itoolbarmanager Used to add actions to the editor tool bar.
     * @see org.eclipse.ui.part.EditorActionBarContributor#contributeToToolBar(org.eclipse.jface.action.IToolBarManager)
     */
    @Override
    public void contributeToToolBar( IToolBarManager itoolbarmanager ) {
        itoolbarmanager.add( runpauseaction );
    }
}
To let the editor use the new action, comment in the block of code at the end of JOGLEditor.init() and the two lines in JOGLEditor.createPartControl().
From viniculture to oenology: Savoring our completed vintage
Now when you run the app, you can see a “Run simulation” button in the toolbar, complete with tooltip and keyboard shortcut.

When you click the “Run simulation” button or press the space bar, the animation begins, the frame rate climbs to its max, and the button icon and tooltip change to “Pause simulation”.

Clicking or pressing the space bar again pauses the simulation. Here’s what our app looks like in Linux:
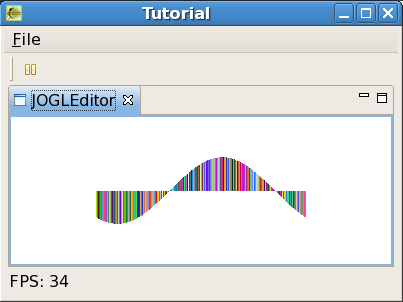
And there you have it! A complete app that lets you start, stop, and exit in a civilized way.
Resources which the reader may find helpful
Eclipse: At http://wiki.eclipse.org/index.php/Eclipse_FAQs there’s a ton of information about Eclipse, including definitions of confusing Eclipse terms.
Eclipse RCP: At http://wiki.eclipse.org/RCP they’ve got a long list of resources that will help with Eclipse RCP programming.
A list of the revisions which we have made to this document
Tutorial: Creating native binary executables for multi-platform Java apps with OpenGL and Eclipse RCP
Wade Walker // Oct 25, 2010 5:02:52 AMGreets to my peeps, and to eybody reppin’ the 512! Wade Walker back in the house, and hype for some third-time tutorialization.
I also return to the dwelling! Debonair of aspect, felicitous of phrase: “Stitio” is my nom-de-guerre!
Hey, did I miss something? I thought your name was “Interstitius” or something Latiny like that.
“Interstitius” was not so swashbuckling as I had hoped. This shorter, Italianate version should manifest my dashing and adventurous persona to any pulchritudinous lady-beings who may chance upon these writings.
That kind of sounds like you’re an alien AI impersonating a Renaissance Italian Musketeer.
Even so! You have seized upon the very crux of my intent!
People keep telling me that.
So! In our last tutorial, me and the mutably-named Stitio showed how to speed up the rendering in our cross-platform scientific application by using OpenGL’s vertex buffer objects.
This time, we’ll show you how to create true native binaries for these sorts of Eclipse RCP apps. This lets you distribute them the same way as non-Java apps, so you don’t have to use wrapper scripts or other hackery.
Ante-ante-prelude: An overview of how “Java apps” are normally launched
When you compile a Java app, it’s turned into .class files, one per Java class. Eclipse puts them into the “bin” or “classes” directory inside the project directory. Here are the .class files for our previous tutorial:
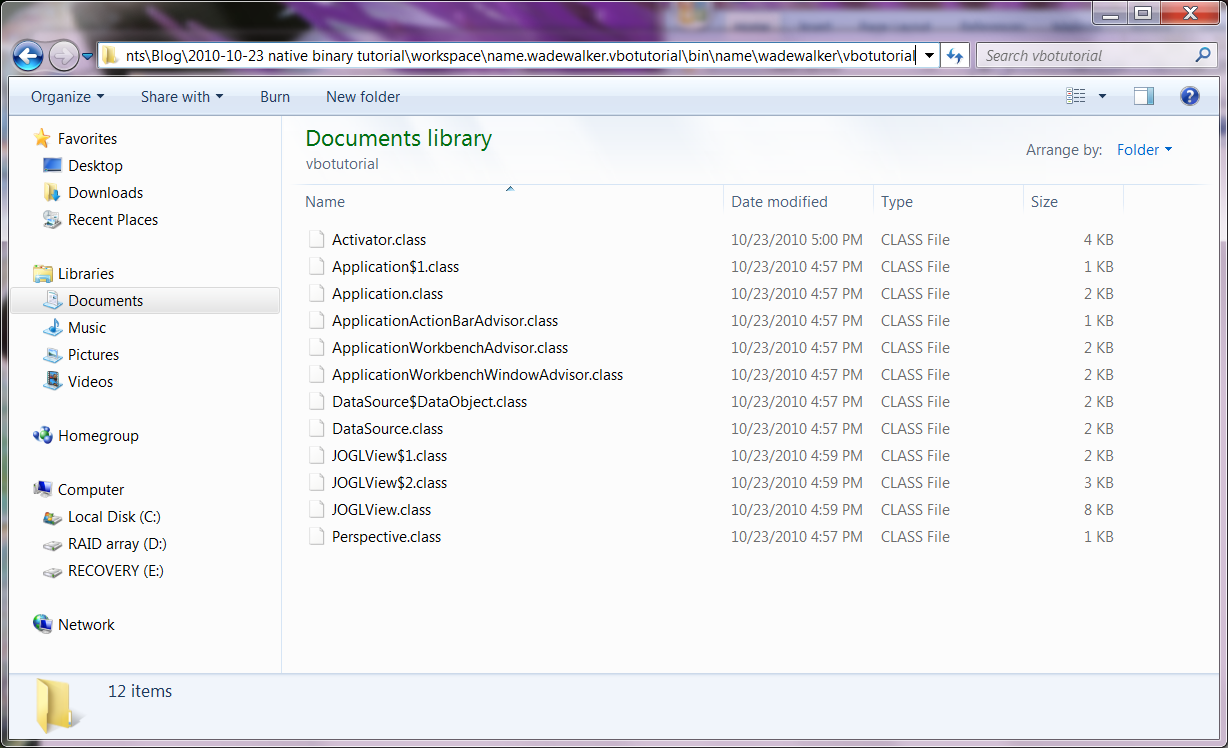
These files are full of platform-independent Java byte code that the Java virtual machine (JVM) interprets. To run an app that’s compiled into a directory of files like this, you have to type
java –classpath MyClassDir MyMainClassName
But some users are gonna be put off by this. It would be nicer if you could just double-click “MyApp.exe” to run, like for a normal app.
We can get closer to that by packaging our .class files into a single JAR (Java ARchive) file. Here’s how you do it:
jar cfm MyApp.jar MyMainClassName MyClassDir/*.class
This makes a single .jar file containing all your .class files, with a “manifest” file inside that tells Java which class is your main class. Then you run it like this
java -jar MyApp.jar
Or on Windows if you have a Java Runtime Environment (JRE) installed, you can just double-click the JAR file and Windows will add in the java -jar for you.
They call these kinds of .jar files “executable JARs”, but they’re not native binary executables, they’re really just zip files full of .class files. And this type of JAR can’t hold the native libraries that are in Java OpenGL, because those libraries have to be sitting on the file system separately so the operating system can see them.
Ante-prelude: How might one create a “Java native binary”?
Well, there’s no way to do it by using the “java” and “jar” commands that come with a Java installation. You have to use some third-party system. If we weren’t already using Eclipse, we might use something like launch4j or JSmooth.
But! Eclipse itself comes as a native binary, and it has its own built-in system that lets you create similar ones for your Eclipse RCP apps. Take a look at the Eclipse installation:

You can see there’s a small native binary, “eclipse.exe”, plus a bunch of directories. These directories contain all the JAR files and other stuff that’s part of Eclipse. When you run “eclipse.exe”, it finds the JRE on your system, unpacks any native libraries into its “configuration” directory, shows a splash screen, then runs java -jar SomeEclipseJARFile.jar for you.
But why is there so much stuff in this installation directory? It’s possible to make a Java native binary that’s one single executable file: an executable header with the JAR file appended. So why doesn’t Eclipse do it like that?
Several reasons. First, having a “plugins” directory lets you drop additional JARs into the installation. You need to do this if your app is something like Eclipse, where you can download and install new features over time.
Second, if your app contains native libraries (.dll or .so files), they need to be unpacked and written out as separate files before the operating system can load them. Eclipse does that for you, and hides them down inside the “configuration” directory.
Third, the “eclipse.ini” file let users pass extra startup arguments to the app or the JVM without having to put them on the command line every time.
And fourth, you can include a “jre” directory in the installation that makes your app completely independent of any Java installation on the host computer.
So, bottom line: Eclipse’s native binary system is complex, but gives you lots of options and room to grow your app into something bigger later on.
Prelude: We augment our Eclipse installation
Eclipse can already export native binaries for the platform you’re running it on. But if you want to export native binaries for all the other platforms at the same time, you have to install the Eclipse Delta Pack. To find it, start at the Eclipse download site and click the “Other Downloads” link under “Eclipse Classic”.

Then click the version of Eclipse you’ve got installed under “Build Name”. I’ve got version 3.6.1 installed.

Then finally click on the delta pack download link. The one I got was “eclipse-3.6.1-delta-pack.zip”.

Unzip this file where you want to install the delta pack. I put it beside my Eclipse installation and called it “eclipse-3.6.1-delta-pack”. You can also unzip it directly onto your Eclipse installation, but everyone seems to advise against that. Here’s how mine looks.

We still have to tell Eclipse where to find the delta pack, but we can’t do that until we set up our workspace, since Eclipse stores that setting in your workspace’s “.metadata” directory.
Intermezzo: For expediency’s sake, we re-use our previous project
We’ll use our previous masterwork as a starting point. First, create a new workspace directory and unzip this file and this file from the last tutorial into it. Then follow the instructions from the last tutorial to import those projects into your workspace.
Or, as usual, if you just wanna skip to the end of this tutorial without all the typing and clicking, create your new workspace directory and unzip this file and this file into it, then import the projects. You’ll still have to point Eclipse at your delta pack, though.
Entremet: We inform Eclipse as to the location of our “delta pack”
Now that we have a workspace to store these settings, click “Window > Preferences” from the menu, open “Plug-in Development” on the left, click “Target Platform”, and select the “Running Platform” on the right. Then click “Edit…”.

When the “Edit Target Definition” dialog appears, click “Add…”.

Then select “Directory” and click “Next”.

Enter the directory where you put the delta pack. Mine is right beside Eclipse, so I can do it like this: “${eclipse_home}\..\eclipse-3.6.1-delta-pack”. Then click “Finish”.

Now you should see the delta pack in your platform like this. Click “Finish” again.

Finally, click “OK” to dismiss the Preferences dialog. Eclipse will grind for a moment, then the delta pack is in! Just remember, if you make a new workspace later, you gotta do this again.
Opus: The creation of our “product”
Now we tell Eclipse what it needs to know to export our tutorial as native binaries. Right-click the “name.wadewalker.tutorial” project in the Package Explorer and select “New > Product Configuration”. Enter “Tutorial” as the file name, then click “Finish”.

This creates a new file “Tutorial.product” in the “name.wadewalker.tutorial” directory. This file will hold all the settings we need to export native binaries. It should look like this to start with:

Now change the version to “1.0.0”. Click the “Application” drop-down and select “name.wadewalker.vbotutorial.application”.

Then click the “Launching” tab at the bottom of the Tutorial.product window. Enter “Tutorial” as the launcher name.

Then click the “Overview” tab to go back, and click the “Eclipse Product export wizard” link to start the native binary export.
When the export wizard comes up, set the root directory to “bin”. Then set the destination to an empty directory where you want the native binaries to go. I put mine in a directory called “installation” beside the workspace, but it can be anywhere. Minor annoyance: this apparently has to be an absolute path. Then check the “Export for multiple platforms” box and click “Next”.

Check the boxes of the platforms you want to export to. I’m doing Linux GTK 32- and 64-bit, Mac OS X Cocoa 64-bit, and Windows 32- and 64-bit. I don’t have a way to test the Mac version right now, but we can at least see that it exports. Click “Finish” to start the export process.

Exporting takes a minute or so, but once it’s done you should see this in your destination directory:

There’s one directory per platform, and one common “repository” that holds JARs and other files that are the same for all platforms. If you look down inside the “win32.win32.x86_64\bin” directory, you’ll see an installation that looks just like Eclipse:

Double-click on that executable, and pow! Here’s the binary running on Windows 7 64-bit:

And onomatopoeia! Here it is on CentOS 5.4 64-bit:

Now you can write one Java OpenGL app, export it, and get native binaries for five different platforms at once. And that, my friends, is super-genius-ness in action!
Postlude: Where further customization is left for your amusement, chiefly due to our laziness
You can see from all the tabs and fields of the “Tutorial.product” file that there’s a lot more customization you can do. You can put in a custom splash screen, custom icon, custom JVM arguments, and a lot more.
One thing that doesn’t work right as of Eclipse 3.6.1 is the “Bundle JRE for this environment with the product” check box on the “Launching” tab of “Tutorial.product”. If you check the box, re-export, and compare the exported product to the one you had before, you’ll see they’re freaken identical.
But then we open up the smartness hose on this problem. Find the JRE directory of your system’s Java installation, which looks like this:

Create a new directory in your app’s installation (under the same platform as your system) and name it “jre”. Then copy the contents of the above JRE directory into it. Now that platform in your installation should look like this:

And now when you double-click your “Tutorial.exe”, it will use the “java.dll” and “jvm.dll” from this new “jre” directory instead of using your system’s installation of the JRE. I’ve confirmed this with Windows Process Explorer, and I’ve done it on Linux the same way. The Eclipse launcher always looks here first, so we’re just putting a JRE right where it expects to find one.
I usually put this annoying little step in an installation script. I custom-made a zipped JRE for each platform, and I have the script unzip them into the right directories during the install process.
Resources which the reader may find helpful
Windows Process Explorer: Get it here. It helps verify that you’re really getting the JRE from where you think you are. It’s also handy for seeing where the JOGL DLLs get unpacked to.
Eclipse product configurations: There’s a tutorial from Lars Vogel here that has more details than I give.
A list of the revisions which we have made to this document
Tutorial: Faster rendering with vertex buffer objects
Wade Walker // Oct 18, 2010 12:06:07 AMHi again! Wade Walker here: engineer, would-be scientist, and second-time tutorializer.
I return as well! Dashing being-about-town and nascent heading-writer “Interstitius”, at your service
What can I say—he brings a unique sensibility to his work. Anyway, in our last tutorial, me and Stish showed how to create the skeleton of a scientific app using Eclipse RCP and Java OpenGL (JOGL, which I like to pronounce “joggle”).
This time, I’ll show how to speed up rendering by using OpenGL’s “vertex buffer objects” instead of glBegin and glEnd like we did last time. I’ll also keep evolving the tutorial towards a “real” scientific app by making the data source more like scientific data.
Science, ho!
Formerly our method of drawing was easy, but slow
This is how you draw one quadrilateral (what we call a “square”, “rectangle”, “trapezoid”, or “rhombus” in English, except that the last two are technically Greek) in old-style OpenGL:
glBegin( GL_QUADS );
    glVertex3f( -1.0f, 1.0f, 0.0f );    // top left
    glVertex3f( 1.0f, 1.0f, 0.0f );     // top right
    glVertex3f( 1.0f,-1.0f, 0.0f );     // bottom right
    glVertex3f( -1.0f,-1.0f, 0.0f );    // bottom left
glEnd();
Perfectly straightforward – it draws one quad, which has four vertices, as quads often do. Easy to understand, easy to write. So why not do everything like this?
In a somewhat predictable inversion, our new method is difficult, but fast
Here’s why we can’t: in a real app, you’ve got a huge mess of stuff between glBegin and glEnd, and the OpenGL driver will struggle to optimize it into something efficient that it can send to the graphics card. Sometimes this works OK, but other times the driver can’t handle it well, and the result is something that’s correct, but slow.
Here’s how we fix it. We create a vertex buffer object, which is just a big chunk of memory that holds the objects we want to draw. Then we send it to our graphics card all at once, where it gets drawn super-fast by dedicated hardware.
The new hotness of vertex buffer objects makes you do all the hard work of setting up your object data in the exact format that the graphics card can process the fastest. So at the price of a few extra drops of programmer brain-juice, your users get faster graphics. And everyone’s happy!
I won’t show an example yet, because it’s too ugly to put first thing in the tutorial. Just hold on to that dream of gloriously fast graphics while we set up this new project.
Importing all of one’s projects at a stroke
This time instead of crawling through the tutorial one file at a time, I zipped up all the projects so you can slurp them into Eclipse all at once.
Download this file and this file, rename them so they end with “.zip” instead of “-zip-not-a.doc”, and unzip them inside an empty folder that you’ll use as a new Eclipse workspace. Then start Eclipse, select “File > Switch Workspace > Other…”, browse to your new workspace folder, and click “OK”. If you see the welcome screen, click the “Workbench” button on the right to go past it.
Then select “File > Import…” from the main menu, select “Existing Projects into Workspace”, and click “Next”.

Click “Browse…”, navigate to your workspace folder, and click “OK”. Then you should see these seven projects. Click “Finish” to import them into your workspace.

The word “import” is a little misleading here, since the projects were already in your workspace folder. What happened just then was Eclipse wrote into its “.metadata” folder inside the workspace folder, to tell itself which projects are in the workbench. The next time you open Eclipse, you should see the same projects again.
A rather unsporting leap forward to reveal this tutorial’s outcome
Let’s run the tutorial first to see what it does, then I’ll go back and explain it. After importing the projects, you should be seeing this:

Now right-click on “name.wadewalker.vbotutorial” in the “Package Explorer” view on the left, then select “Run As > Eclipse Application.” Now bask in the glory of vertex buffer objects! Yes, bask!

Perhaps a bit of explanation is needed for this rather uninspiring image?
I’m on it. This is supposed to approximate what a scientific visualization program might do. The sine wave on screen is made of 300,000 skinny vertical quads of different colors. The quads are stationary, but they’re constantly changing size to make the sine wave look like it’s moving. The “frames per second” (FPS) counter in the bottom left shows you how fast your system can render this demo. The code that creates this data is in DataSource.java.
Before an actual scientist VR-stabs me over the internet, let me say that of course no scientist would need to visualize something so simple. Because they’re all über-geniuses! But this demo is to show us how to program, not how to drop science. The point is that we have a source of data that’s constantly changing, and we have to throw it up on screen as it evolves.
So how does it work?
Creating a vertex buffer object ex nihilo
Technically it’s not created from nothing, it’s created from electrons, smarty-shorts. To see how, open up the “name.wadewalker.vbotutorial” project in the Package Explorer on the left, then drill down to “src/name.wadewalker.vbotutorial”, double-click on “JOGLView.java”, and scroll to this part.
//================================================================
/**
 * Creates vertex buffer object used to store vertices and colors
 * (if it doesn't exist). Fills the object with the latest
 * vertices and colors from the data store.
 *
 * @param gl2 GL object used to access all GL functions.
 * @return the number of vertices in each of the buffers.
 */
protected int [] createAndFillVertexBuffer( GL2 gl2, List<DataObject> listDataObjects ) {

    int [] aiNumOfVertices = new int [] {listDataObjects.size() * 4};

    // create vertex buffer object if needed
    if( aiVertexBufferIndices[0] == -1 ) {
        // check for VBO support
        if(    !gl2.isFunctionAvailable( "glGenBuffers" )
            || !gl2.isFunctionAvailable( "glBindBuffer" )
            || !gl2.isFunctionAvailable( "glBufferData" )
            || !gl2.isFunctionAvailable( "glDeleteBuffers" ) ) {
            Activator.openError( "Error", "Vertex buffer objects not supported." );
        }

        gl2.glGenBuffers( 1, aiVertexBufferIndices, 0 );

        // create vertex buffer data store without initial copy
        gl2.glBindBuffer( GL.GL_ARRAY_BUFFER, aiVertexBufferIndices[0] );
        gl2.glBufferData( GL.GL_ARRAY_BUFFER,
                          aiNumOfVertices[0] * 3 * Buffers.SIZEOF_FLOAT * 2,
                          null,
                          GL2.GL_DYNAMIC_DRAW );
    }

    // map the buffer and write vertex and color data directly into it
    gl2.glBindBuffer( GL.GL_ARRAY_BUFFER, aiVertexBufferIndices[0] );
    ByteBuffer bytebuffer = gl2.glMapBuffer( GL.GL_ARRAY_BUFFER, GL2.GL_WRITE_ONLY );
    FloatBuffer floatbuffer = bytebuffer.order( ByteOrder.nativeOrder() ).asFloatBuffer();

    for( DataObject dataobject : listDataObjects )
        storeVerticesAndColors( floatbuffer, dataobject );

    gl2.glUnmapBuffer( GL.GL_ARRAY_BUFFER );

    return( aiNumOfVertices );
}
First we create a vertex buffer object with glGenBuffers, then do a glBufferData to allocate the size we want. Every vertex needs three floats for the position (x, y, z), and three more for the color (r, g, b). Then we use glMapBuffer to get an object we can write into, we write all our floats into it, then we call glUnmapBuffer to finish.
Might you explain why both colors and vertices are placed into a so-called “vertex buffer”?
Aha, good point! It’s true that in math, a “vertex” is really just a point where lines meet, but in computer graphics we can also consider the color to be a part of the vertex. There can be more stuff in a vertex too, like the normal vector, texture coordinates, and other things we don’t need yet. So “vertex buffer” isn’t really a misnomer.
Why, then, do we interdigitate the positions and colors? Could we not write all of one, then all of the other?
Alternating positions and colors in a single vertex buffer speeds things up by preserving data locality. When you write the data into the buffer, you don’t want to be writing to two widely separated addresses, because your computer’s memory system isn’t good at that.
Similarly, if the graphics card has to fetch the positions from one address in memory and the colors from a very different address to render each triangle, it’s gonna be slower than if all the data for that triangle is close together.
I originally used separate position and color buffers for this tutorial, and when I switched to one “interdigitated” buffer, I got a 5% to 10% increase in frame rate.
Rendering one’s vertex buffer
Here’s the code to draw the vertex buffer we just created, also in JOGLView.java:
// needed so material for quads will be set from color map
gl2.glColorMaterial( GL.GL_FRONT_AND_BACK, GL2.GL_AMBIENT_AND_DIFFUSE );
gl2.glEnable( GL2.GL_COLOR_MATERIAL );

// draw all quads in vertex buffer
gl2.glBindBuffer( GL.GL_ARRAY_BUFFER, aiVertexBufferIndices[0] );
gl2.glEnableClientState( GL2.GL_VERTEX_ARRAY );
gl2.glEnableClientState( GL2.GL_COLOR_ARRAY );
gl2.glVertexPointer( 3, GL.GL_FLOAT, 6 * Buffers.SIZEOF_FLOAT, 0 );
gl2.glColorPointer( 3, GL.GL_FLOAT, 6 * Buffers.SIZEOF_FLOAT, 3 * Buffers.SIZEOF_FLOAT );
gl2.glPolygonMode( GL.GL_FRONT, GL2.GL_FILL );
gl2.glDrawArrays( GL2.GL_QUADS, 0, aiNumOfVertices[0] );

// disable arrays once we're done
gl2.glBindBuffer( GL.GL_ARRAY_BUFFER, 0 );
gl2.glDisableClientState( GL2.GL_VERTEX_ARRAY );
gl2.glDisableClientState( GL2.GL_COLOR_ARRAY );
gl2.glDisable( GL2.GL_COLOR_MATERIAL );

glcanvas.swapBuffers();
We use glVertexPointer and glColorPointer to set the starting positions in the buffer, with the first color pointer three floats after the first position. Then we tell the graphics card that each new position and color is six floats past the current one. We call that a “stride” of six floats, which is 24 bytes. Then finally we draw the whole buffer full of quads with just one command, glDrawArrays.
What, then, is the benefit of all our labors?
I did this tutorial with glBegin/glEnd first, as a test. When I switched to a vertex buffer, the frame rate increased by 100%.
And this is a worst-case scenario, too. In many apps, most of the scene will be constant from one frame to the next, so we can just move the viewpoint and call glDrawArrays again without changing the vertex buffer at all.
As a test, I changed the tutorial code to only write the vertex buffer once, and the frame rate jumped from 14 to 25. So vertex buffers are almost 200% faster than glBegin/glEnd for this more common situation.
Might we run faster still?
There are 600K triangles here (2 per quad), and at 14 FPS, that’s 8.4 million triangles per second. With the vertex buffer written only once, we get 25 FPS, or 15M tris/sec.
I downloaded the NVIDIA performance tools and profiled a couple of C++ DirectX demos that come with them. One got 5.7M tris/sec, and one got 8.4M tris/sec. They had texturing and other effects turned on, so their rendering isn’t as simple as ours, but their triangle rates seem comparable.
But! When I look at the theoretical maximum speed, things aren’t so clear. My graphics card is an NVIDIA GeForce 8800 GTX, which can supposedly do 250M tris/sec on the 3DMark06 benchmark. That would give 417 FPS on our tutorial! Why is 3DMark06 16 times faster than us?
A few thought-experiments as to how our speed could be increased
Part of it may be the geometrical primitives 3DMark06 is rendering. We’re rendering quads, which have four vertices for two triangles, which means two vertices per triangle. If we jumped ahead in the OpenGL playbook and used triangle strips instead, we could get that down to one vertex per triangle, which could double our frame rate.
But we need to double our rate three more times to get to that theoretical max. If we removed the color information and just drew all the triangles in the same color, we could halve the size of our vertices and maybe double the speed again.
But how do we double it two more times? No clue.
Maybe changing the vertex buffer every frame is saturating the bus between my computer and the video card? Let’s check.
My video card is designed for an x16 PCI Express 1.x slot, which is rated at 4GB/sec. In this tutorial, each vertex buffer is (300,000 quads) * (4 verts/quad) * (6 floats/vert) * (4 bytes/float) = 28,800,000 bytes. At 14 FPS, that’s 403,000,000 bytes/sec, which is only about 10% of our bus capacity. So that can’t be the problem.
Hmm, I’m out of ideas for the moment. But handing back my super-genius credentials isn’t an option, so I’ll look into this and cover it in a future tutorial.
Resources which the reader may find helpful
OpenGL tutorials: Check out http://nehe.gamedev.net/. These go over OpenGL more slowly and thoroughly than I do, and are recommended.
The OpenGL Programming Guide, nth edition: You can buy it for about $50 on Amazon. It’s definitive, but not exactly a tutorial. The style of OpenGL I’ve used so far is actually 1.5 to 2.0, not the latest 4.1 stuff, so make sure to get a book about the version you want.
Basic documentation: At http://www.opengl.org/ you can find docs for the C API calls. The ones in JOGL are Java-fied, but you can usually tell how to translate one to the other.
A list of the revisions which we have made to this document